Showing posts with label Hand Made Cords. Show all posts

Sunday 3 April 2022

New Cord Maker Modifications, And Adding A Core To A Cord

How Do All,
I was recently asked by a customer if I could add a central hook to the cord maker which I produce, and also a removable manual crank handle.
The reason for the central hook is that the customer would like to use the cord maker for making cords/rope with a central core, like shroud laid rope.
From the Oxford Reference:" The name given to rope laid up with four strands instead of the more usual three. The strands are laid up round a heart, or central, strand, as the four strands would not bind close enough together, and without a heart would leave a central hollow. Size for size, shroud-laid rope is not as strong as hawser-laid rope. However, it is less liable to stretch, and therefore proved more suitable to be used in sailing vessels as standing rigging."
And the reason for the manual crank handle is so that the machine can be used as a traditional cord maker, using a traveller and rope top for forming the strands into a cord/rope.

Making a cord or rope with a core is not so easy in itself, and made in the traditional method the yarns would have been spun up into strands, and then the core positioned before the rope was laid up, the rope top having a central hole for the core strand to pass through.
Also due to the rope becoming shorter that the length of the strands as it laid up; the core would have to be managed by another set of hands.

My cord maker, and cord making method being completely different from the traditional means that the above method will not work as the cord forms from the centre out, all the time the drill spinning at high speed, so no space, and not safe for another set of hands to manage the core at either end! however my cordmaker can be used single handed so friends or helpers are entirely optional.

So, after trialling several different ways that I could possibly use my cord maker to make a cord or rope with a core strand I finally came up with the one thing that actually works.

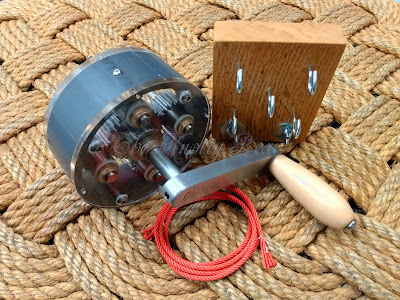
I attached a ball bearing swivel to the central hook on the machine, this allows the machine and hooks to rotate as intended without the the central core being over twisted or untwisted, as either of these would effect the lay of the final cord and its integrity.

At the opposite end of the cord/rope walk sits the outend; which replaces the traveller as the cord maker itself travels instead, I added a central hook here also and the core passes over this and off the bench, the end of the core strand is weighted to take up the slack as the strands are initially spun up.

Below you can see the core strand exiting the formed cord.

If you have any questions regarding making cords/rope with my cord maker, either with or without a core; please feel free to ask.

Take care,
Barry, The Knotty Bear

Saturday 17 April 2021

Cord Making Machines.

 How Do All,

I have been busy making tools the past few weeks for customers in various parts of this small world.

Here are a few of my recent cord making machine sets, all now gone, but more are being made in my small workshop and are available to order. 
Details can be found here:  Tools and Materials Shop

 
Ideal for making your own cords for Ply-Split Braiding & all other Cord Crafts.
Please see my Ply-Split Braiding page for examples of some of the items I make using my own hand made cords.

This machine quickly and efficiently makes cords from all kinds of yarns, including toilet paper and plastic bags if you like, made to your own diameter preference and firmness of lay from soft to super hard,  S or Z laid cord can be made, mixed colour or mixed yarn cords can be made. You are only limited by your imagination and whatever yarn you have.

These machine are designed and completely hand made by myself from the finest materials in my small workshop. I use these very machines myself and I have been making and using them for over 10 ten years without failure.

These outends are made from recycled Oak, some of which had some nice oil? stains.
The wood is sanded and sealed with several coats of shellac.

Detail of the brazed hooks.

Making a 10 meter sample of 10mm diameter sisal rope, made with very fibrous packing twine.


Thank you for looking,
Take care,
Barry.

Wednesday 10 July 2013

Dice Bags & Shaker Cups


How Do All ;-)
Complimentary Colours.

Back in 2004 on an ice climbing trip to Ouray Colorado I happened into Ouray Toys, as any grown man would do! and found a game called Pocket Farkel (also known as 10'000 among other names) and marketed by Legendary Games inc. 
This came in a little plastic box printed with the Ouray Toys logo and not only became a great souvenir of a great trip, but would become my most favorite game ever and has accompanied me on many climbing and non climbing trips over the years.

I was trying to think of a unique and personal birthday gift for my girlfriend, and as it just so happened she seemed to like Farkel too, so I decided to make her a Ply-Split Braided dice shaker cup and a fully reversible dice bag, along with a set of Chessex Vortex Dice in a nice swirly Teal colour to match the bag, also a set of instructions and some tiny 7mm dice, just for fun.

This Dice Shaker cup is based upon one that I made whilst on holiday in Kettwig Germany last year. This one is made from my own hand made, 4 strand paper cords, made with my cord making machines. the technique used to braid the cup is Ply-Split Braiding, and is Single Course Oblique Twining, SCOT for short.
the pattern is arranged to resemble converging train tracks. also Pictured with the Teal, Chessex Vortex dice.

The bottom of the dice cup. 

The dice bag, reversed.

The dice bag, right side out.

Hidden Treasures! 

This is the afore mentioned dice shaker cup which I made whilst on holiday in Kettwig, made from left over scraps of my hand made paper cords from another project. Ply-Split Braided in SCOT. pictured with multi-coloured dice.

The bottom of the dice cup.

The Prototype dice bag I made first to get the dimensions right, this one came out a little small but will do for me ;-) made from recycled fabric from old combat pants.

A Bag O' Joy!

Take care,
Barry ;-)

Tuesday 26 February 2013

More Gripfids

How Do All ;-)

I just finished covering a set of Gripfids for a customer in Switzerland.


The tools are 6mm, 8mm and 10mm diameter, suitable for up to 4mm, 6mm and 8mm cords respectively, 

 The tools have a solid Maple handle, covered with a beautiful Pineapple knot.
The smallest is a 35p x 30b, 5 Pass, Type 5 Pineapple knot, the next is a 36p x 32b, 4 Pass, Type 4 Pineapple knot, and the largest is a 45p x 40b, 5 Pass, Type 5 Pineapple knot.


A close up of the Pineapple knot handles.

I made some Pojama's (covers) for the Gripfids from odd ends of climbing rope with the core stripped out.
practical or not? who knows ;-)  

For more info about, and pictures of Gripfids see the link below:
And to see some of the items I have made using Gripfids, check out my Ply-Split Braiding page


Please contact me if you have any questions: knotty (dot) bear (at) gmail (dot) com

Please check out my Etsy Shop for more items.

Thank you for looking.
Take care,
Barry ;-)

Tuesday 20 November 2012

Some Grip Fids for Sale!

How Do All ;-)

I have just added some of my hand made Gripfids to my Etsy Shop

This is a must have tool for Ply-Split Braiding, and is also and ideal tool for all other kinds decorative knot work.

The Gripfid is made from seamless Stainless Steel tube, and has a long slender hollow point, which is formed in such a way that it will grip onto a cord end that is inserted into the tip. which holds the cord whilst pulling the tool back through the work piece.
This tool can also be used in a similar way to a marlinespike or Swedish fid and will make a fantastic addition to any knot tyers tool kit.


I have these tools tools in 6mm, 8mm and 10mm diameter suitable for up to 4mm, 6mm and 8mm cords respectively, some are available in longer or shorter lengths.


 The tools are supplied with either a naked solid Maple handle, or covered with a beautiful Pineapple knot.
Below is a 5 Pass, Type 5 Pineapple knot, with a special variation of the standard interweave. 

 Above and below you can see how the tool is use for Ply-Split Braiding. 
The tip of the Gripfid is easily passed through the ply's of the cords, then the cord is inserted and the tool withdrawn pulling the cord with it. and building a beautiful braid.
This tool can be used in this way for splicing as an alternative to the Swedish fid or for tying multi strand decorative knots.

Please contact me if you have any questions: knotty (dot) bear (at) gmail (dot) com

Please check out my Etsy Shop for more items.

Thank you for looking.
Take care,
Barry ;-)


Tuesday 11 September 2012

Ply-Split Braided Linen Belt #2.

Ply-Split Braided Linen Belt #2.

(Note: the colours of this belt are Cobalt Blue and Citrus Green, but due to the light the green colour looks washed out in the photos! however; the last photo here taken during the making shows the correct colours) 

Made with my own hand made Linen cords, total length 1100mm including buckle, width 42mm.
The buckle is a stainless steel roller buckle.

The braid is a 24 strand, 4 section SCOT (single course oblique twining) braid, a 6 strand, 2 section SCOT braid keeper loop, and the end of the belt is finished with a 2 section SCOT braid.

A perfec fit! also shown with one of my conquistadors braid belt loop watch straps, I hate wearing a watch on my wrist.

Close up showing the buckle detail, the SCOT (single course oblique twining)  keeper loop, which is spliced in to the belt itself, and the tip of the belt, of which the ends are all spliced back into the belt braid.


The belt can be pierced at any point along its length by pushing the prong through the braid. When you decide to change the length the old hole will close up with a simple wiggle of the braid.

Showing the very neat edge of the braid created by the Ply-Splitting process.

(This picture shows the correct colours of the belt)
Showing the Braiding process in progress, using one of my hand made Grip Fids, several strands are first split with the tool and then a single cord pulled back through. This process is repeated well over 1000 times in the making of this belt.

You can see more of my Ply Split work here:
Thanks for looking.
Take care,
Barry ;-)

Monday 27 August 2012

Ply-Split Braided Cotton & Flax Vessel.

A Ply-Split Braided Cotton & Flax Vessel.

Created using my own hand laid Cotton and Flax cords.
The body of the vessel is braided in a SCOT (single course oblique twining) design in Cotton.
The rim is made using a Ply-Split Darned section using my own hand made Flax cord.
The ends of the cords are seized and then finished in a very short fringe 
Total height: 205mm.
Body Diameter: 75mm.
Internal Diameter: 54mm
 Overall Rim Diameter: 150mm.


Friday 20 July 2012

More Ply- Split Braiding.

Ply-Split Braided Linen Belt.

Made with my own hand made Linen cords, total length1075mm including buckle, width 42mm.
The buckle is a stainless steel roller buckle.

The braid is a 24 strand, 4 section SCOT (single course oblique twining) braid, a 5 strand POT (plain oblique twining) keeper loop, and the end of the belt is finished with a 2 section SCOT braid.

A perfect fit! also shown with one of my conquistadors braid belt loop watch straps, I hate wearing a watch on my wrist.

Close up showing the buckle detail, the POT (plain oblique twining) keeper loop which is spliced in to the belt itself, and the tip of the belt, of which the ends are all spliced back into the belt braid.

The belt can be pierced at any point along its length by pushing the prong through the braid. When you decide to change the length the old hole will close up with a simple wiggle of the braid.

Showing the very neat edge of the braid created by the Ply-Splitting process.


Ply-Split Braided bag strap.

Made with my own hand made Axminster wool cords, total length 1480mm, width 62mm.
The braid is a 24 strand, 4 section SCOT (single course oblique twining) braid
 The ends are spliced back into the braid and the starting rod was replaced by a cable laid cord with the ends finished in Manrope knots.
The bag that this strap is intended for is still on the drawing board! ;-?


Showing the very neat edge of the braid created by the Ply-Splitting process.

You can see more of my Ply Split work here:
Thanks for looking.
Take care,
Barry ;-)